Guest post from Cristine from Simply Nailogical
Hy ladies!Today I want to share an awesome guest post with you! I was so excited these last few weeks and it was so hard to keep this secret, but now I can spill it!
I asked Cristine from Simply Nailogical, if she wants to do a guest post for me, and I never thought she will agree. Those of you who are on Instagram may now her and her awesome "scaled gradients". I saw one of those designs a few weeks on tumblr, I think, and was totally stunned! I found her blog and asked for a guest post! Long story short - here she is: my personal queen of awesome gradient designs!
***

Hi everyone! I'm super exciting to be writing this guest post because, well, it's my first one! Frankie contacted me a couple weeks ago and was intrigued about my 'scaled gradient' nail art technique.
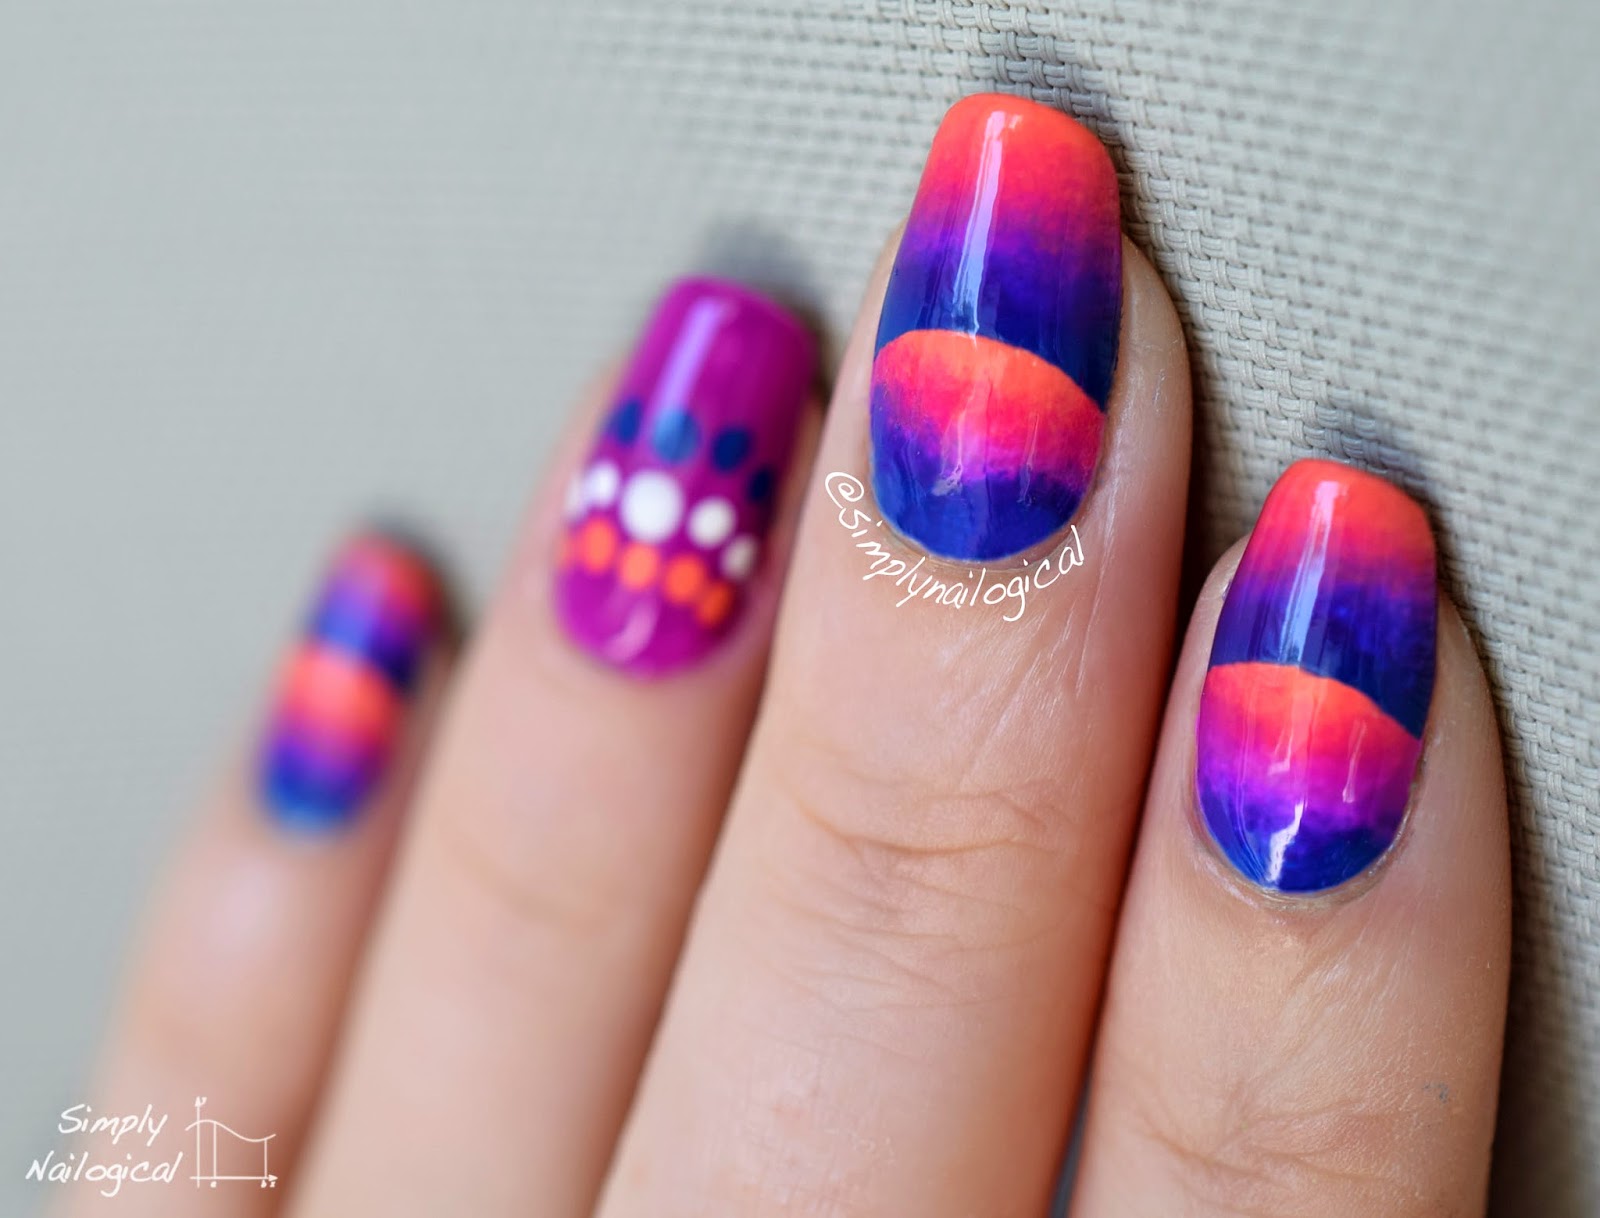
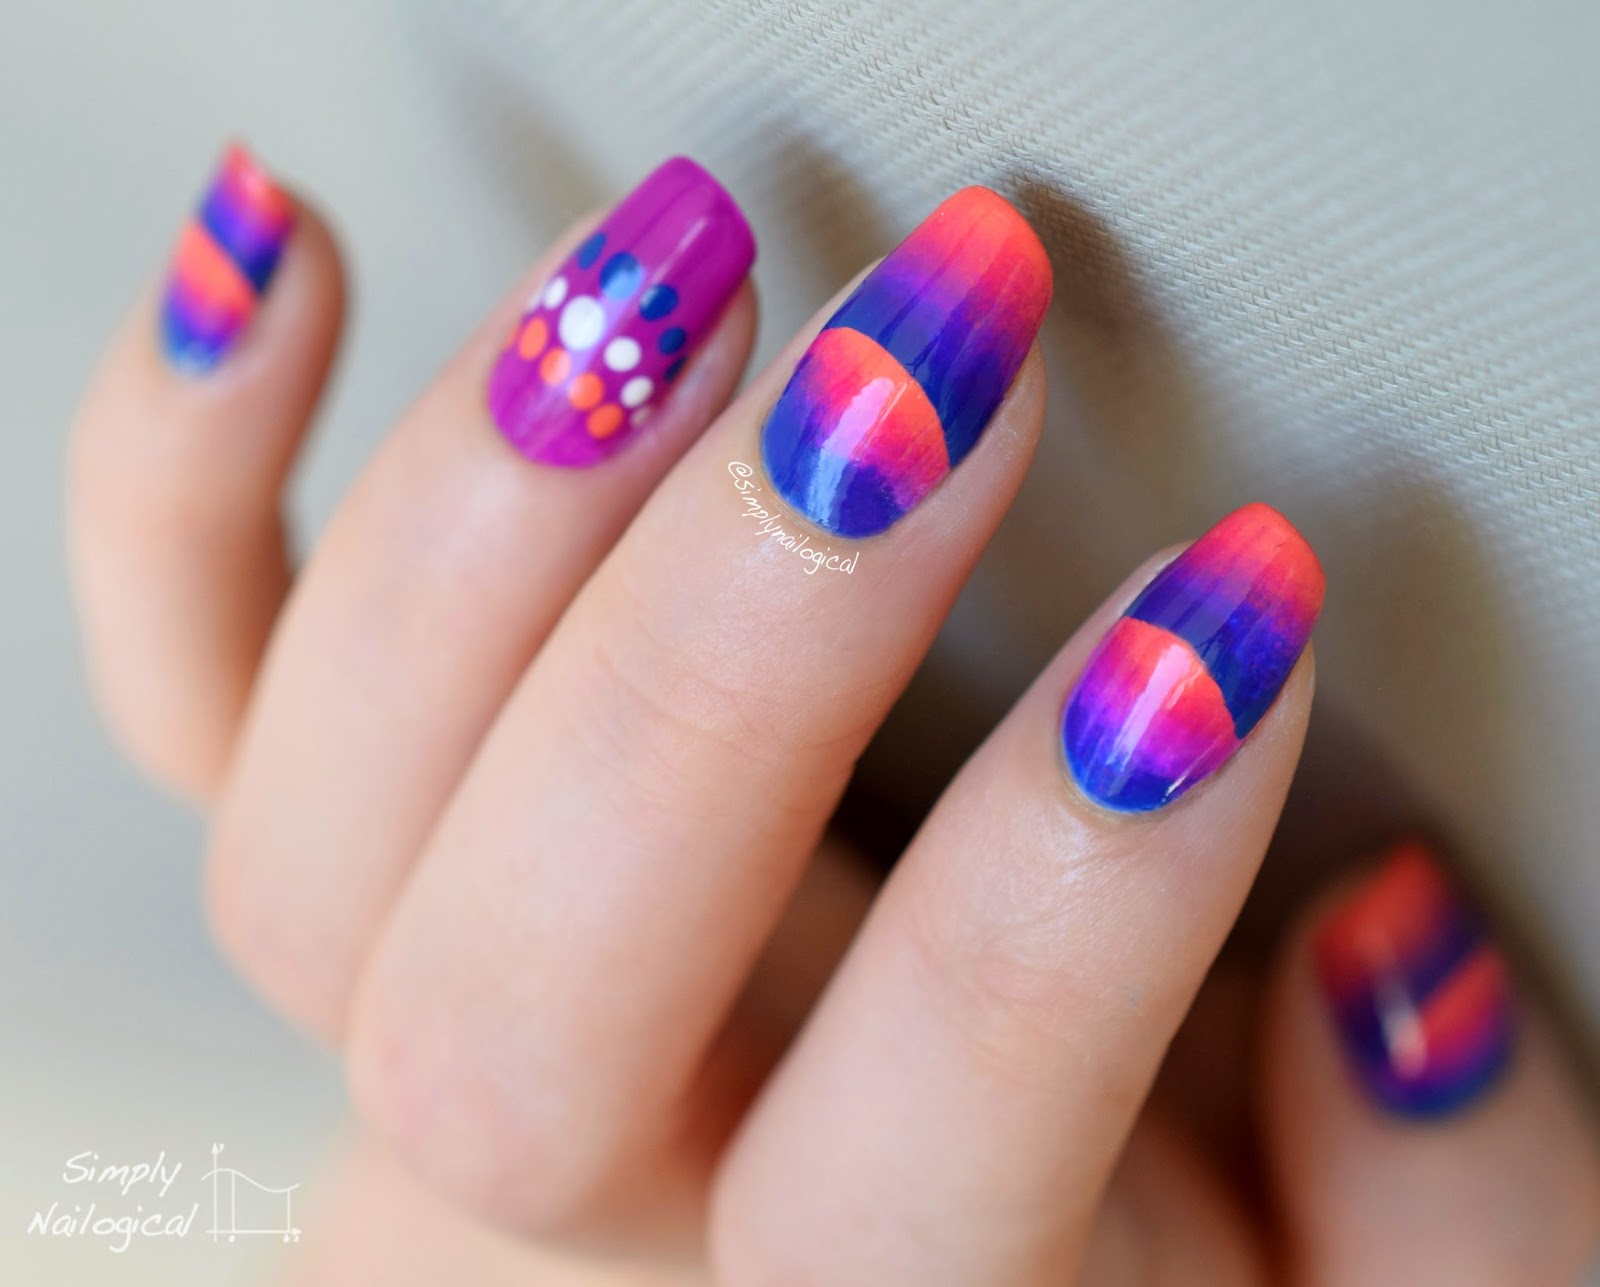
This technique was initially the result of a mistake where I misplaced a nail vinyl before sponging on a second gradient. I saw potential in this mistake and started over, this time intentionally trying to create overlapping gradients. I call this technique a 'scaled gradient' because it involves at least two adjacent distinct, separate gradients, resembling the scales of a reptile or fish due to the overlapping gradient effect. Some say it even makes nails appear 3D. It's one of those designs that appears mind-boggling and 'how did she do that?!' but in fact it is quite straight forward when you break down the steps. That's exactly what I'm going to do for all you lovely readers today!
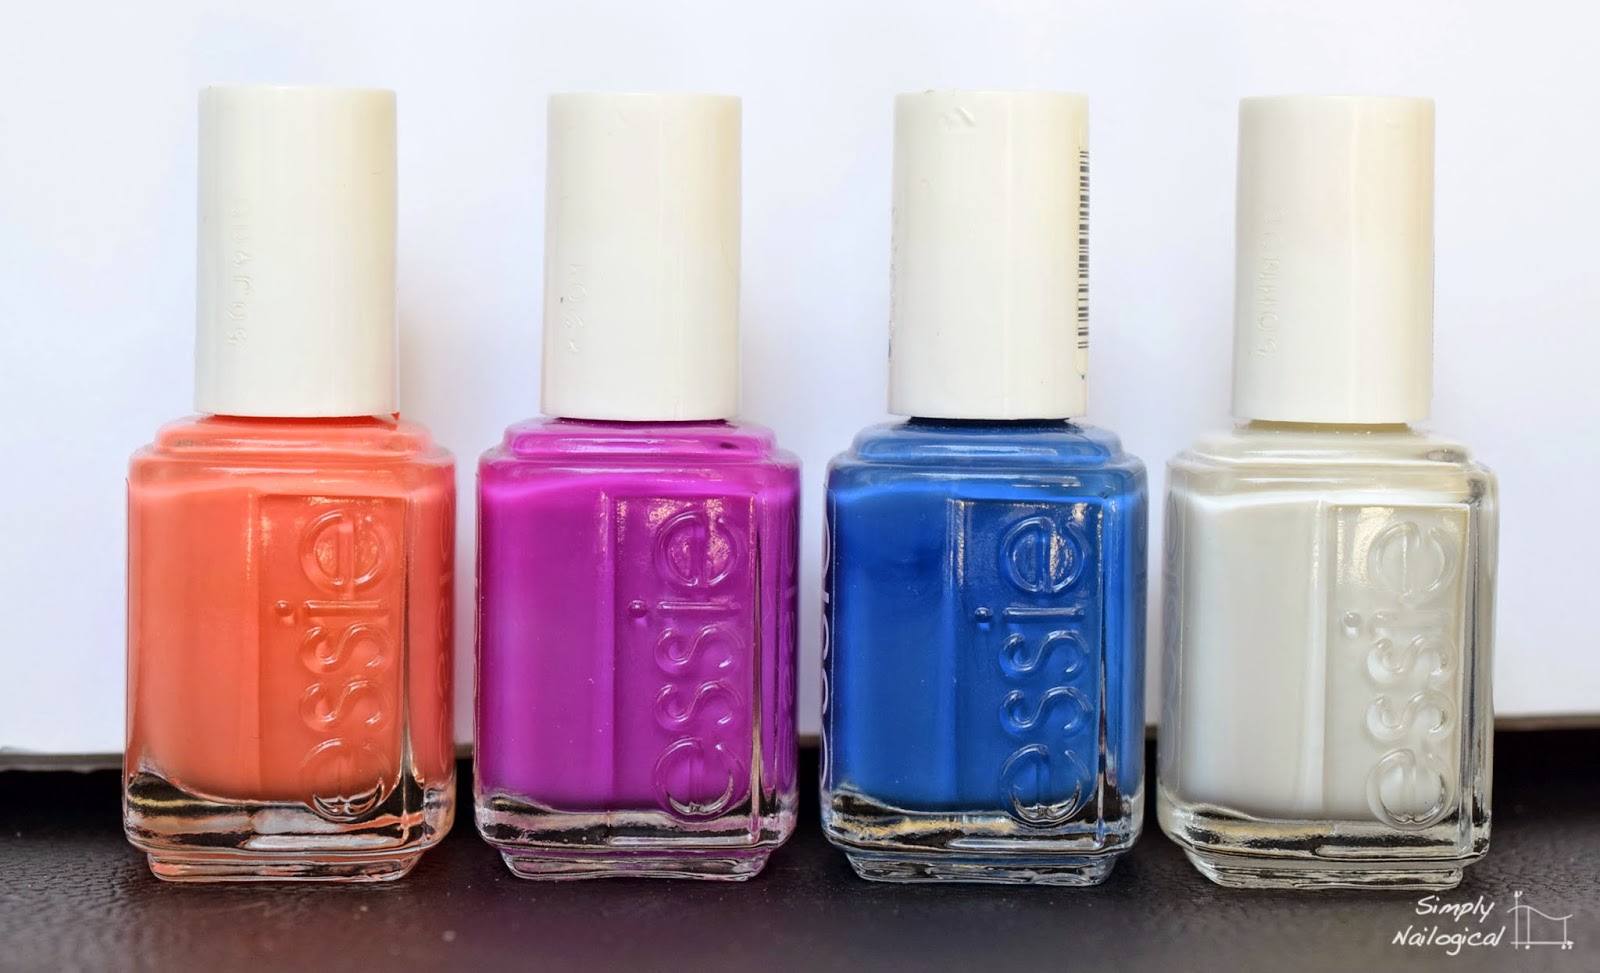
I decided to use only Essie polishes in coral, purple and blue as I wanted a summery look but not too neon and in-your-face (I've already done one of those!). The items I used to execute this mani include:
- Essie 'Blanc'
- Essie 'Tart deco'
- Essie 'DJ play that song'
- Essie 'Mesmerized'
- 2 small triangular disposable make-up sponges (the ones designed to apply foundation)
- Hole reinforcements (you can pick these up in an office supply store in the paper section)
- Tape to protect your skin/first gradient (I use green painter's tape from a local hardware store, but you can use regular scotch tape)
- A good quality quickdry top coat (my favourite at the moment is Glisten & Glow's HK Girl top coat)
- Pure 100% acetone for clean-up, or nail polish remover
- Q-tips or fine eyeliner brush for clean up
- Tweezers to remove hole reinforcement sticker (optional)
- Dotting tool (for accent finger only)

The dotted accent ring finger is rather straight forward, so here's a step-by-step run through of how I did the curved scaled gradient on the rest of the nails - the main feature!:
1. Apply white polish as a base coat. As little coats as possible, but it should be opaque. Let semi-dry.
2. Brush your three polish colours onto the make-up sponge, ordered from darkest to lightest. Here I've used three colours which are very different in hue - this creates for a trickier blend. You may need to apply a couple coats as the first few coats tend to sink right into the sponge.
3. Immediately begin dabbing the sponge onto the nail, ensuring that the darkest colour is closest to the base of the nail/the cuticle. Don't worry about covering the entire nail, focus only on the bottom half of the nail.
4. Repeat step 2 and 3 until the gradient reaches desired opacity. To better blend the colours, dab up and down the nail but only ever so slightly if you are working with varying colour hues like I have here or else the polish will end up with a poor murky blend.
5. Once you are satisfied with the gradient, clean up the skin around the nail (I use 100% pure acetone and a q-tip or an eyeliner brush).
6. Apply quick-dry topcoat and let thoroughly dry. Depending on your top coat, this could be anywhere from 20 mins to 2 hours.
7. Peel off hole reinforcement sticker from the pack and stick it onto the bottom half of the nail, where its edge hits about the half way point up the nail. Apply tape to cover inner hole and ensure that the bottom half of the nail (your first gradient) is completely covered.
8. Using a new sponge, repeat step 2. Immediately begin dabbing the sponge onto the exposed half of the nail, the colours in the same direction and order as your first gradient. This time ensure to cover all the remaining nail.
9. Repeat step 8 until you've reached desired colour opacity and blend.
10. Promptly remove tape and hole reinforcement (with tweezers) carefully from the nail.
11. Clean up any polish on and around the skin, then apply final preferred topcoat. Voila! You have yourself an eye-catching scaled gradient.


I've put together an under 1min video tutorial to go along with this step-by-step guide:
If you have any burning questions, you may find the answer in my recently published "Gradient Guide". In there you'll find tips and tricks and also picture-driven information on the difference between different kinds of gradients.

I hope you've all enjoyed this summery and fun mani! There are endless colour, shape and directional possibilities using this technique. If you find yourself wanting to try out the scaled gradient technique, don't forget to tag me and hashtag your mani on social media with #scaledgradient so I can see! I am most active on Instagram but I am also on Pinterest, Tumblr, and Facebook.
Thanks so much Frankie for having me :)
***
Isn't this f*cking awesome?! Be sure to follow Cristine on any social media she uses to see more stunning designs. She is one of the reasons I joined Instagram lately, because I can't have enough of these intriguing designs!
Thank you so much for your guest post, Christine!
P.S.: What would you think if I give everyone of my lovely readers the chance to guest post for me? I was thinking of a "Guest-Post-Saturday/Sunday"... So if you are interested, don't hesitate and contact me!


0 Kommentare:
Post a Comment